Building an Agent, Step by Step
A complete walkthrough of creating a voice agent on Oshara.ai — from the My Agents page all the way to a deployed, embeddable widget.
01 · Open the My Agents page
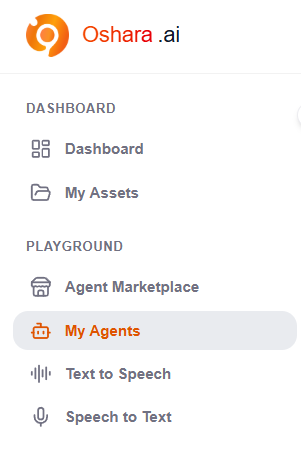
In the left sidebar, under Playground, click My Agents. This is the home for every agent you build — new ones start here.
02 · Start a new agent
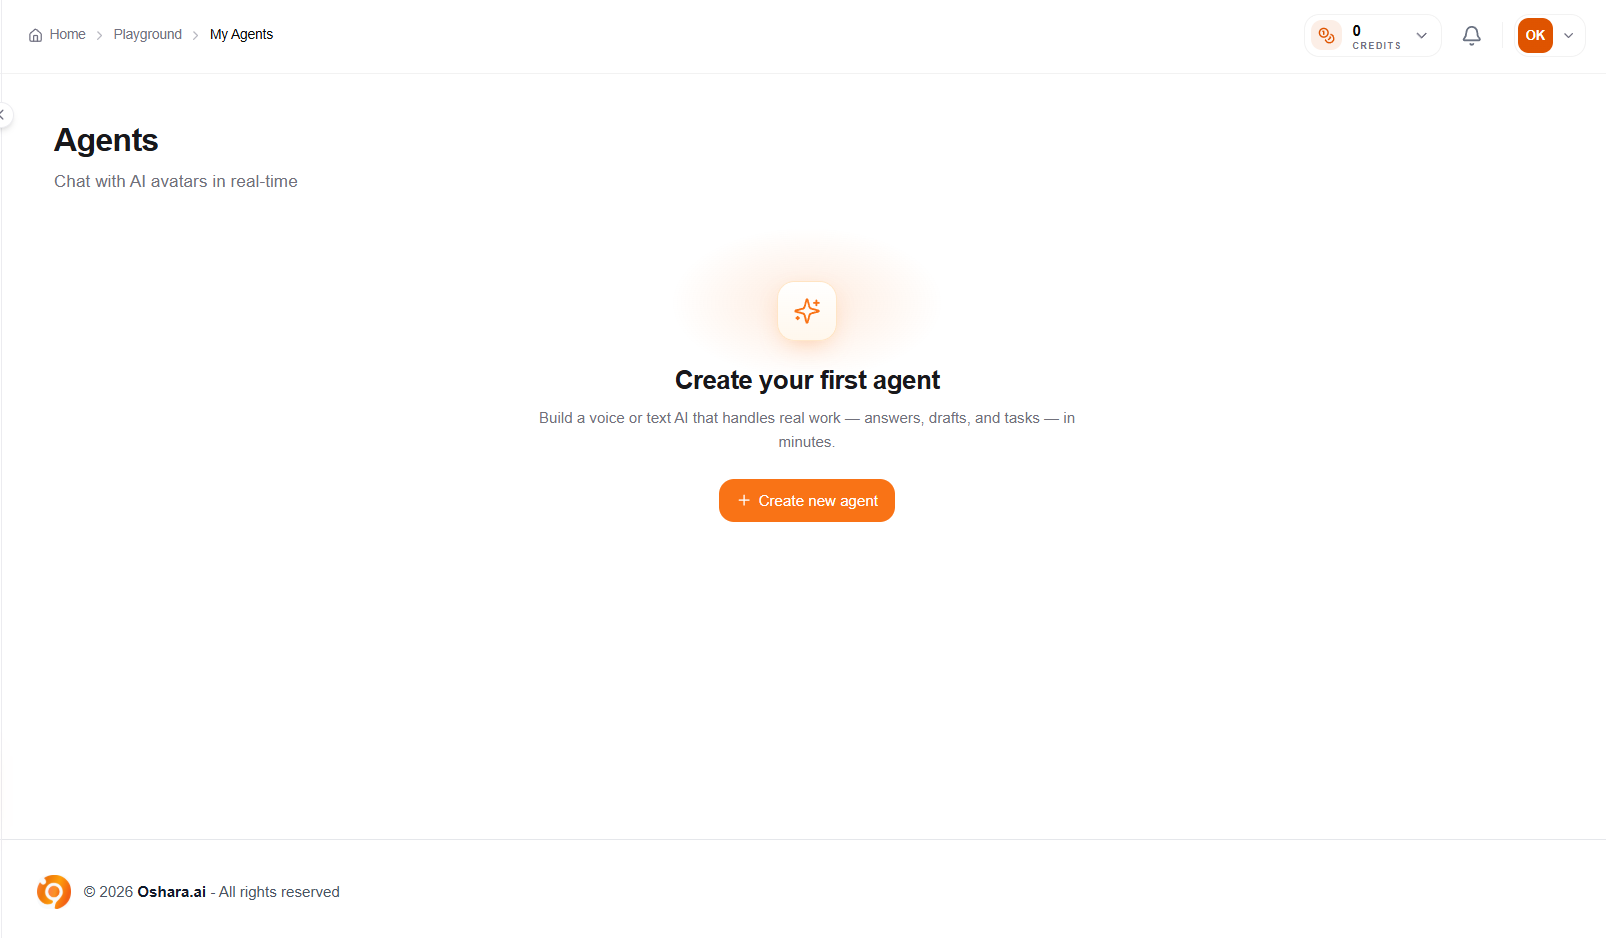
If you haven’t built anything yet, you’ll see the empty state. Click Create new agent to begin. Once you have agents in the list, the same button sits at the top-right of the page.
03 · Name it and choose a starting point
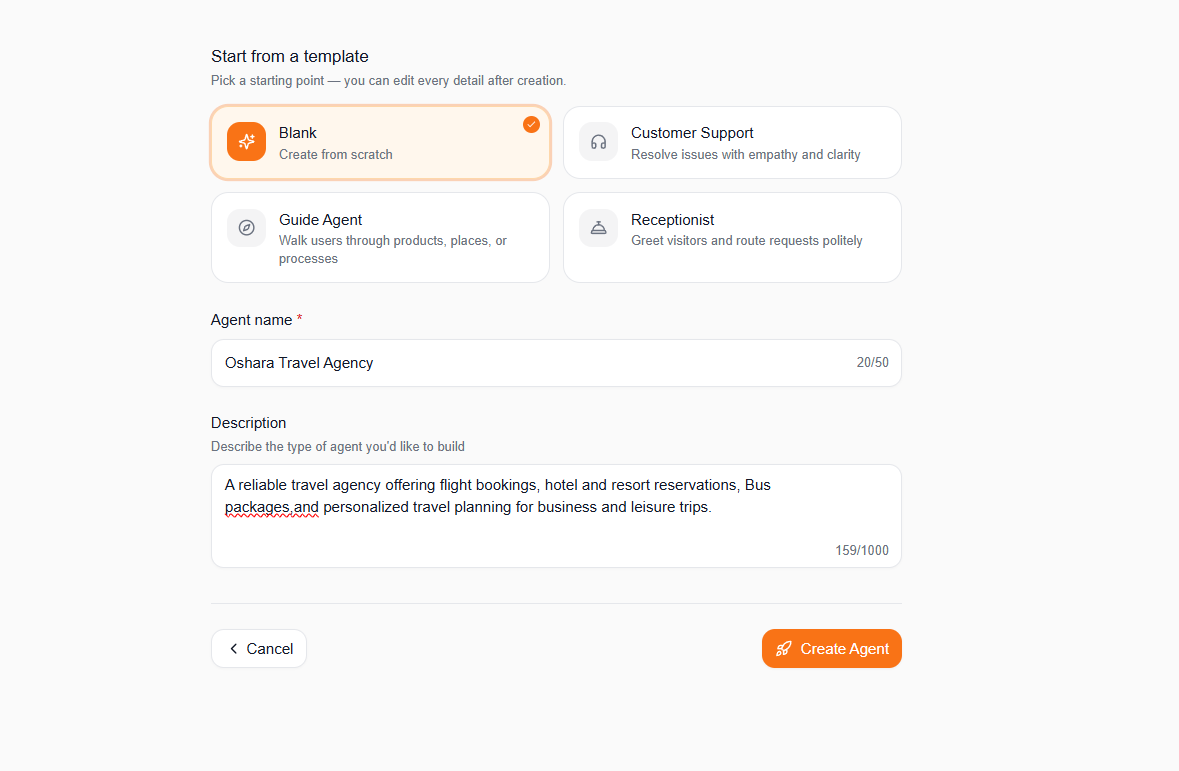
Give the agent a name and a short description of what it does. Then either start from Blank to build from scratch, or pick a ready-made template — Customer Support, Guide Agent, or Receptionist. Templates just pre-fill sensible defaults; you can edit every detail afterwards. When you’re happy, click Create Agent.
04 · Persona: define who the agent is
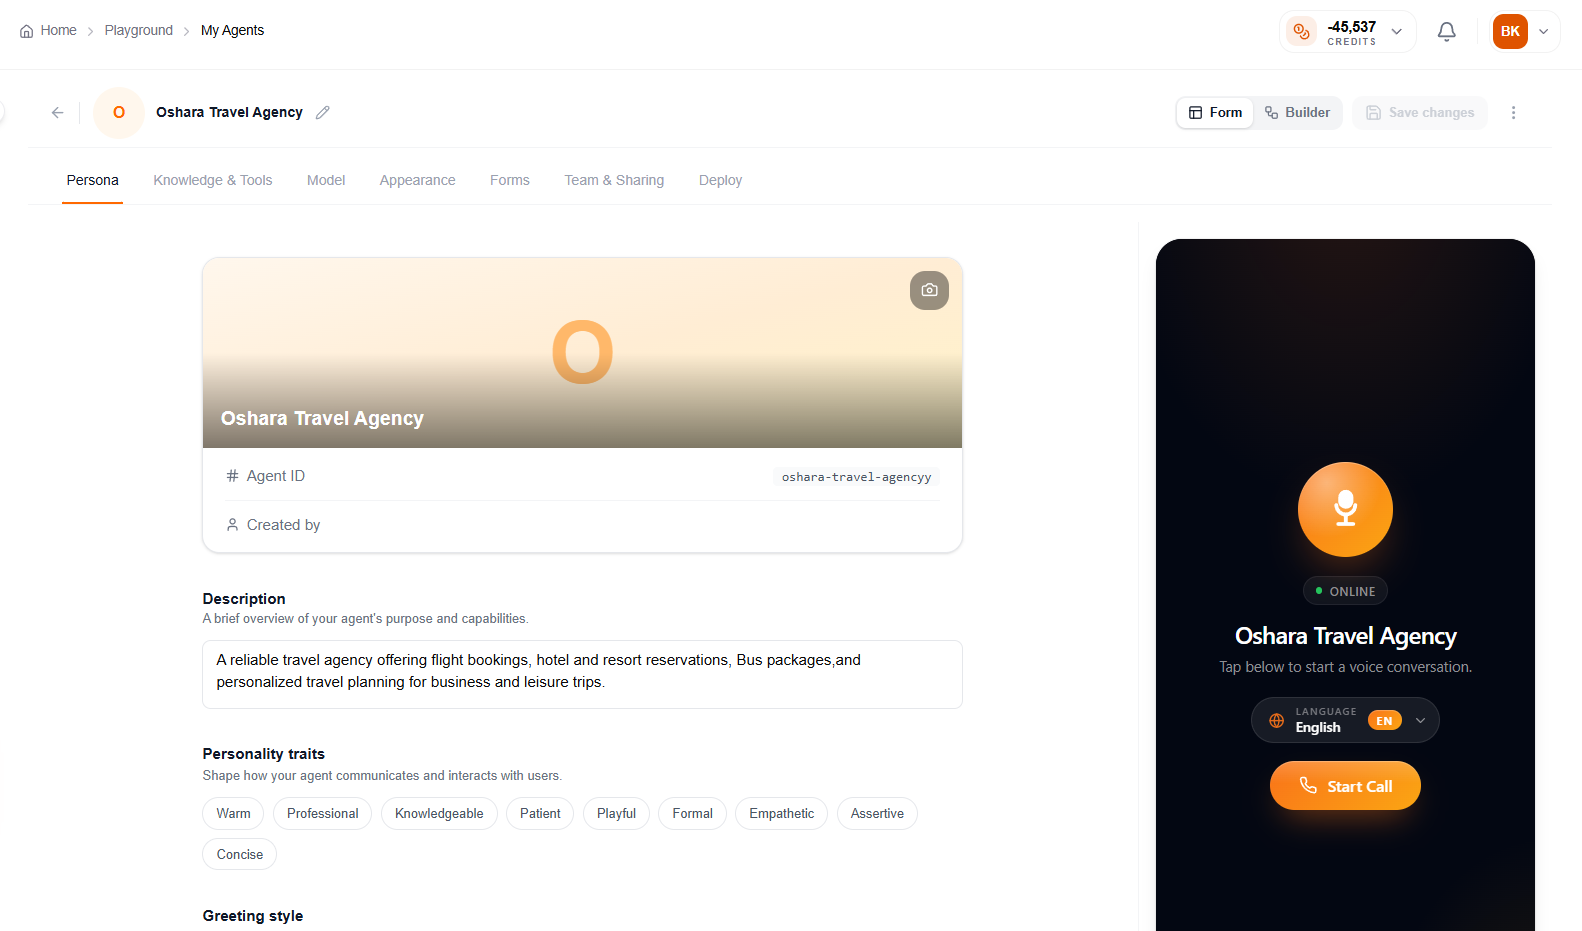
The editor opens on the Persona tab. Along the top are the seven configuration tabs — Persona, Knowledge & Tools, Model, Appearance, Forms, Team & Sharing, Deploy — plus a Form / Builder switch (Form is this tabbed view, Builder is the visual canvas; both edit the same agent). Set the description and choose the personality traits that shape how the agent talks.
Further down, pick a Greeting style, then set the System prompt — the main instruction that defines the agent’s role, tone and rules. You don’t have to write it by hand: click Generate and it drafts one from your description and settings. Finally, set the First message the agent opens with, and optionally add background audio.
05 · Knowledge & Tools: give it context and abilities
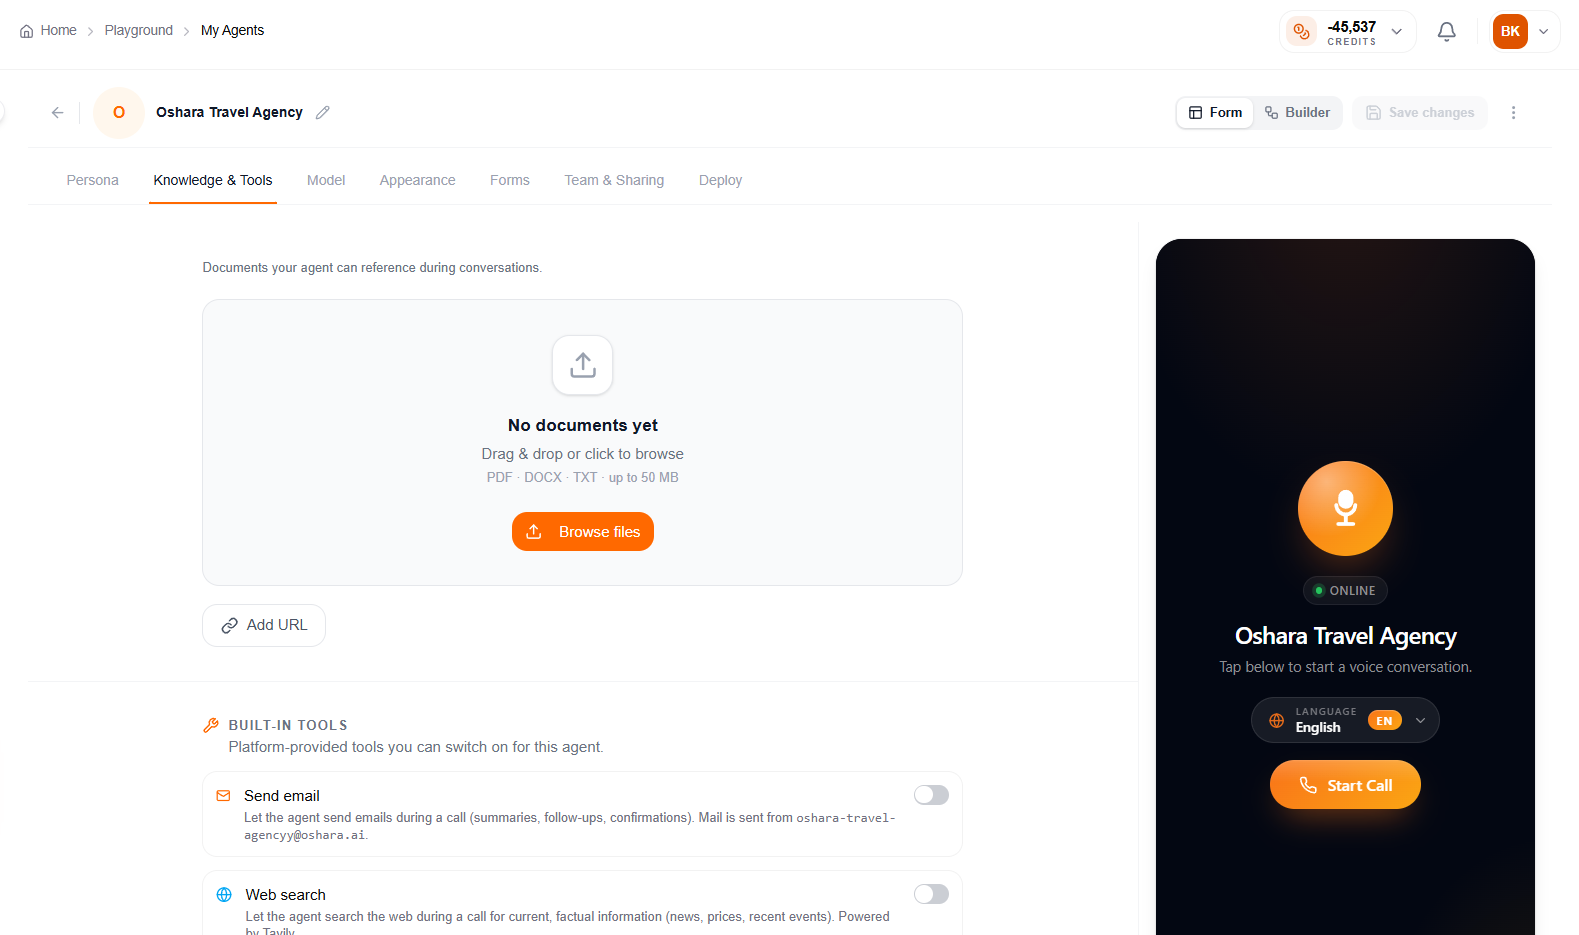
Feed the agent things to reference and things to do.
- Knowledge base — Upload documents (PDF, DOCX, TXT — up to 50 MB) or use Add URL so it can pull knowledge from a web page.
- Built-in tools — toggle Send email (lets it send summaries, follow-ups and confirmations during a call) and Web search (current facts via Tavily).
Scroll down to connect MCP servers with Add Server for advanced integrations, and use Add Tool to configure custom HTTP or client-event tools.
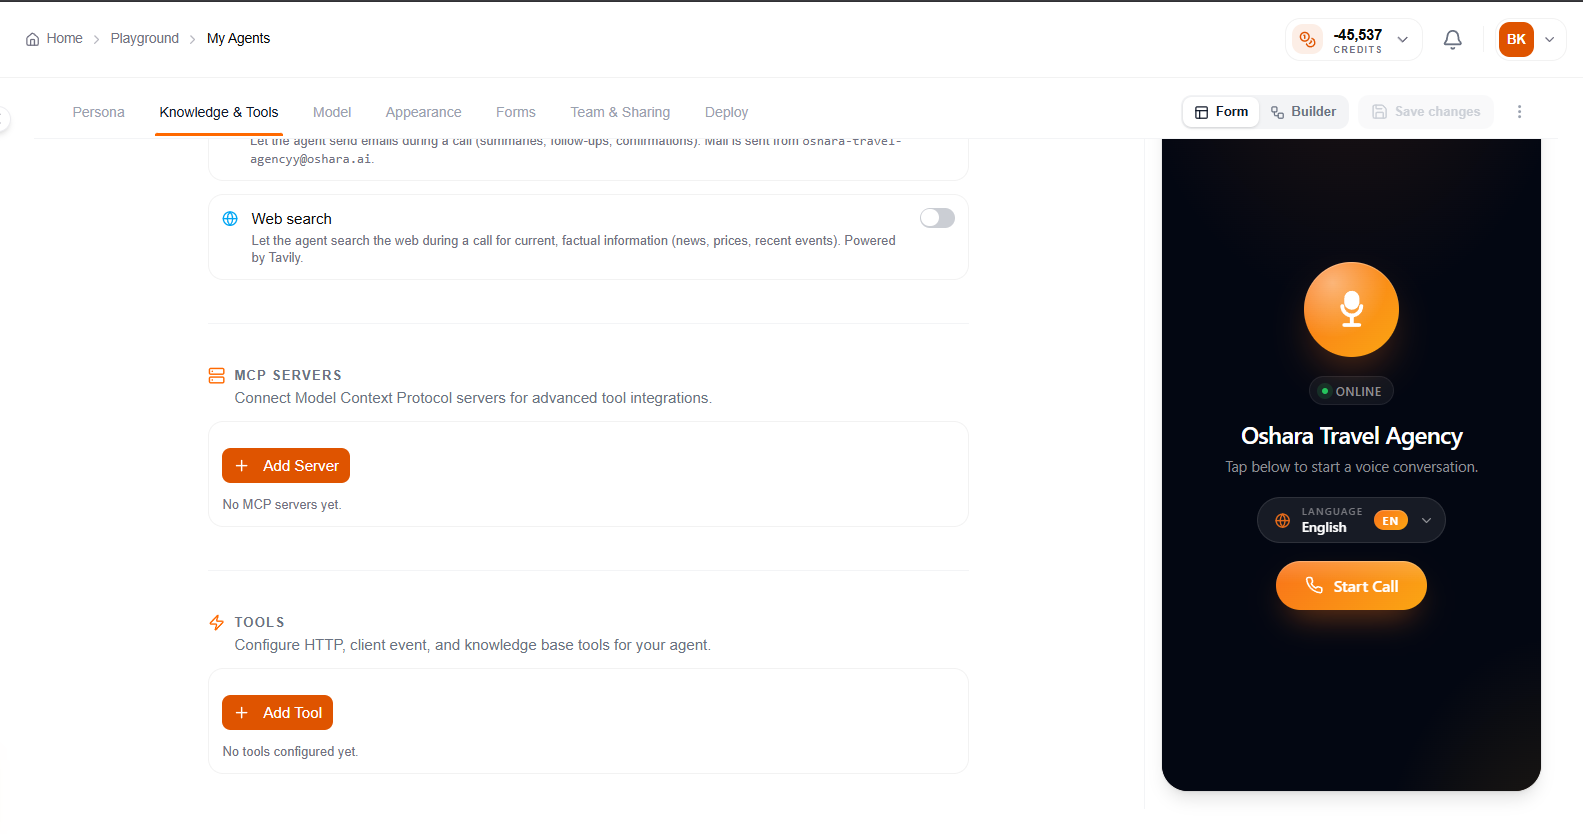
Key controls
- Upload documents / Add URL — the agent’s knowledge base
- Built-in tools — Send email and Web search toggles
- Add MCP server — connect Model Context Protocol servers
- Add custom tool — HTTP, client-event and knowledge-base tools
06 · Model: pick the brain and the voice
Choose the LLM (for example GPT 5.4 mini). Keep Intent conversion on to turn spoken text into cleaner, structured commands before it reaches the model. Then pick your Speech-to-text and Text-to-speech models. Don’t forget to Save changes.
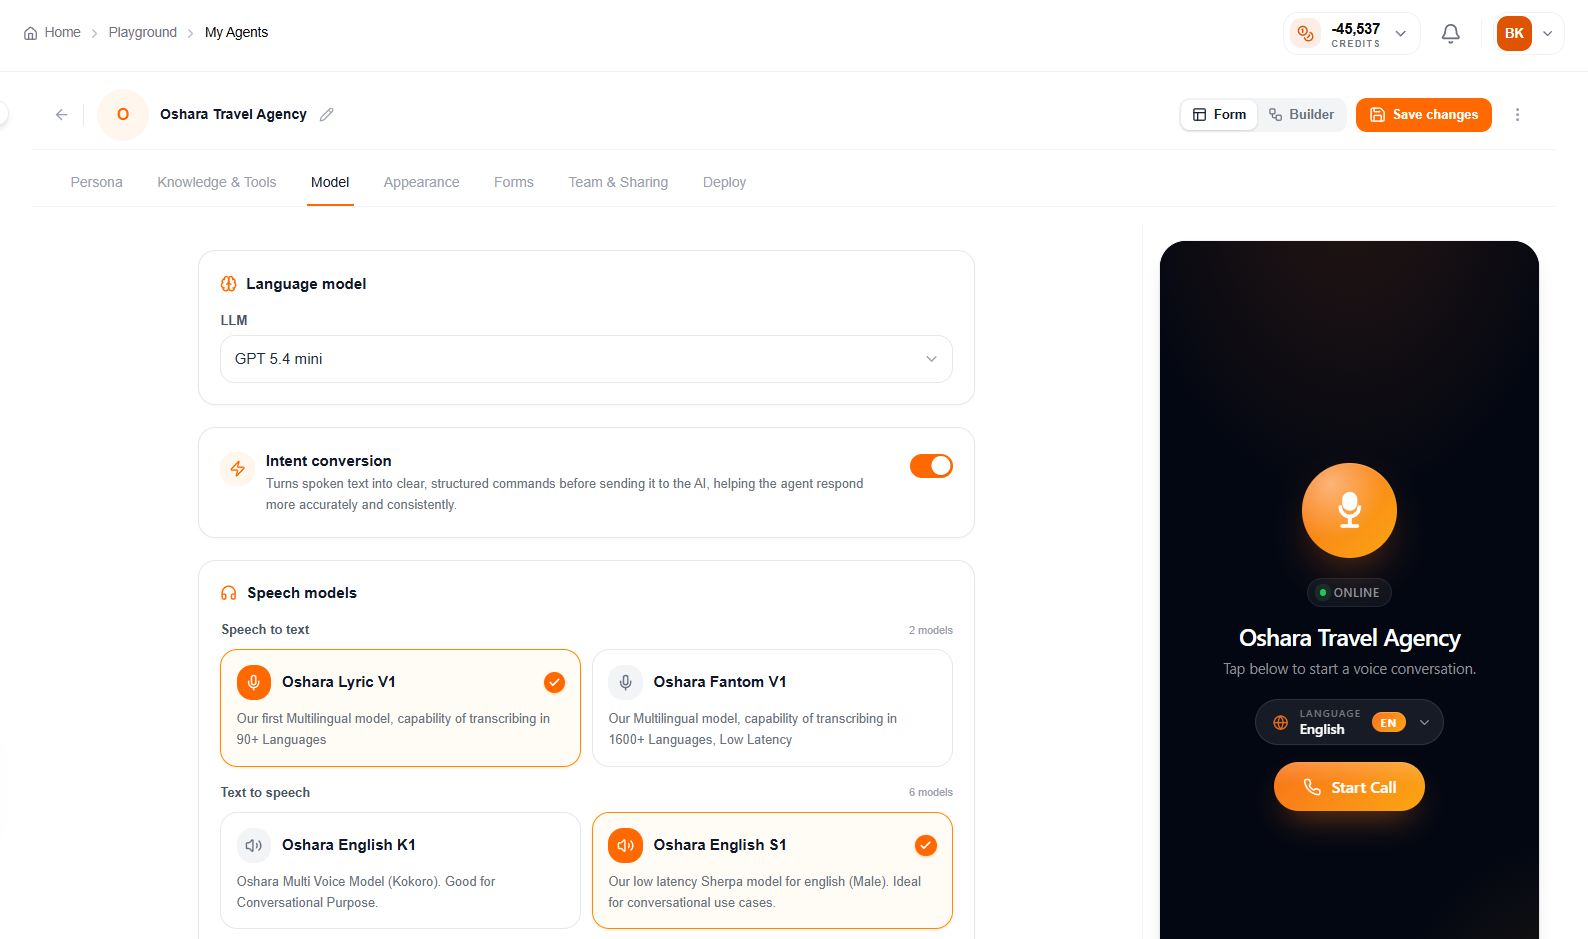
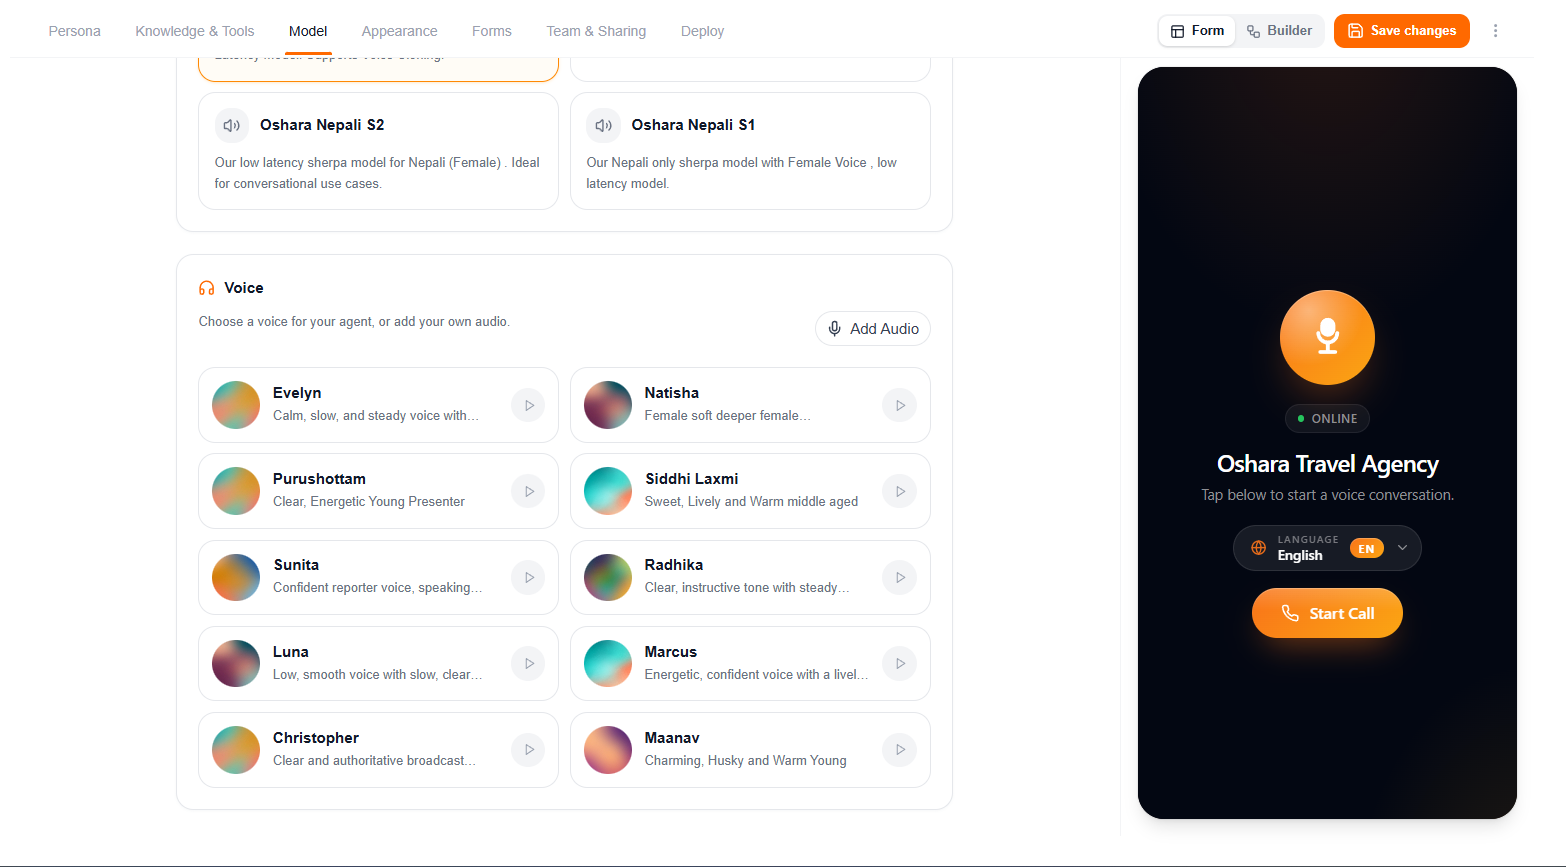
The voices available depend on the TTS model you pick. Choosing Oshara English K1, Oshara Multilingual C1, or XTTS unlocks the full voice library below — preview any voice with the play button, or upload your own with Add Audio.
07 · Appearance: style the widget
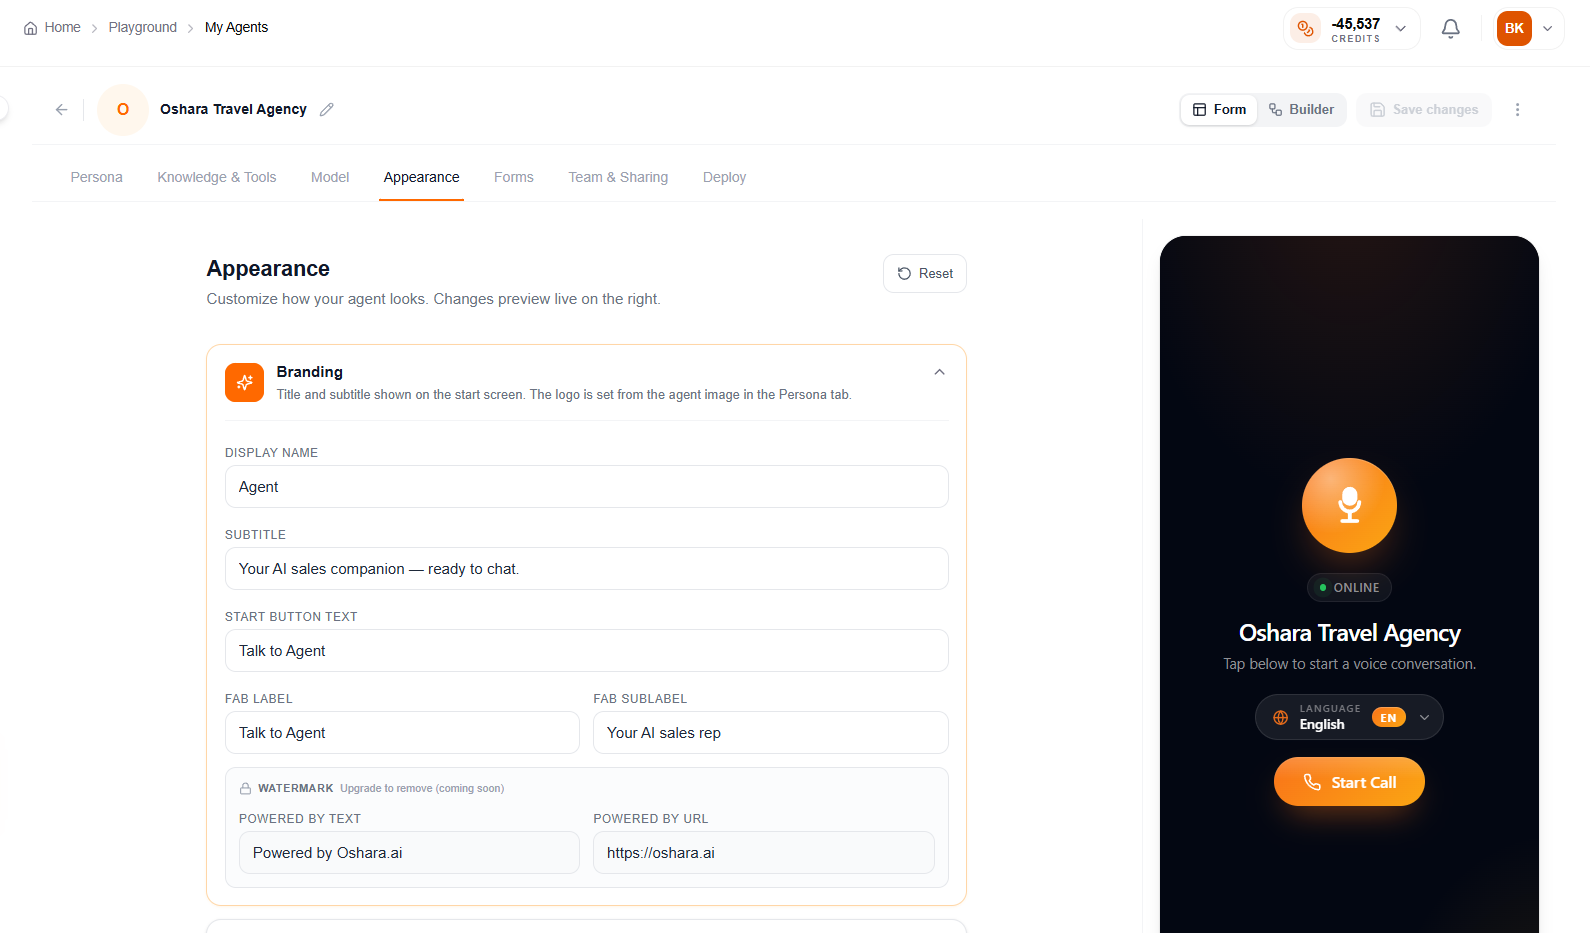
Customise how the widget looks to visitors — the panel on the right previews every change live. Under Branding, set the display name, subtitle, start-button text, floating-button labels and the watermark.
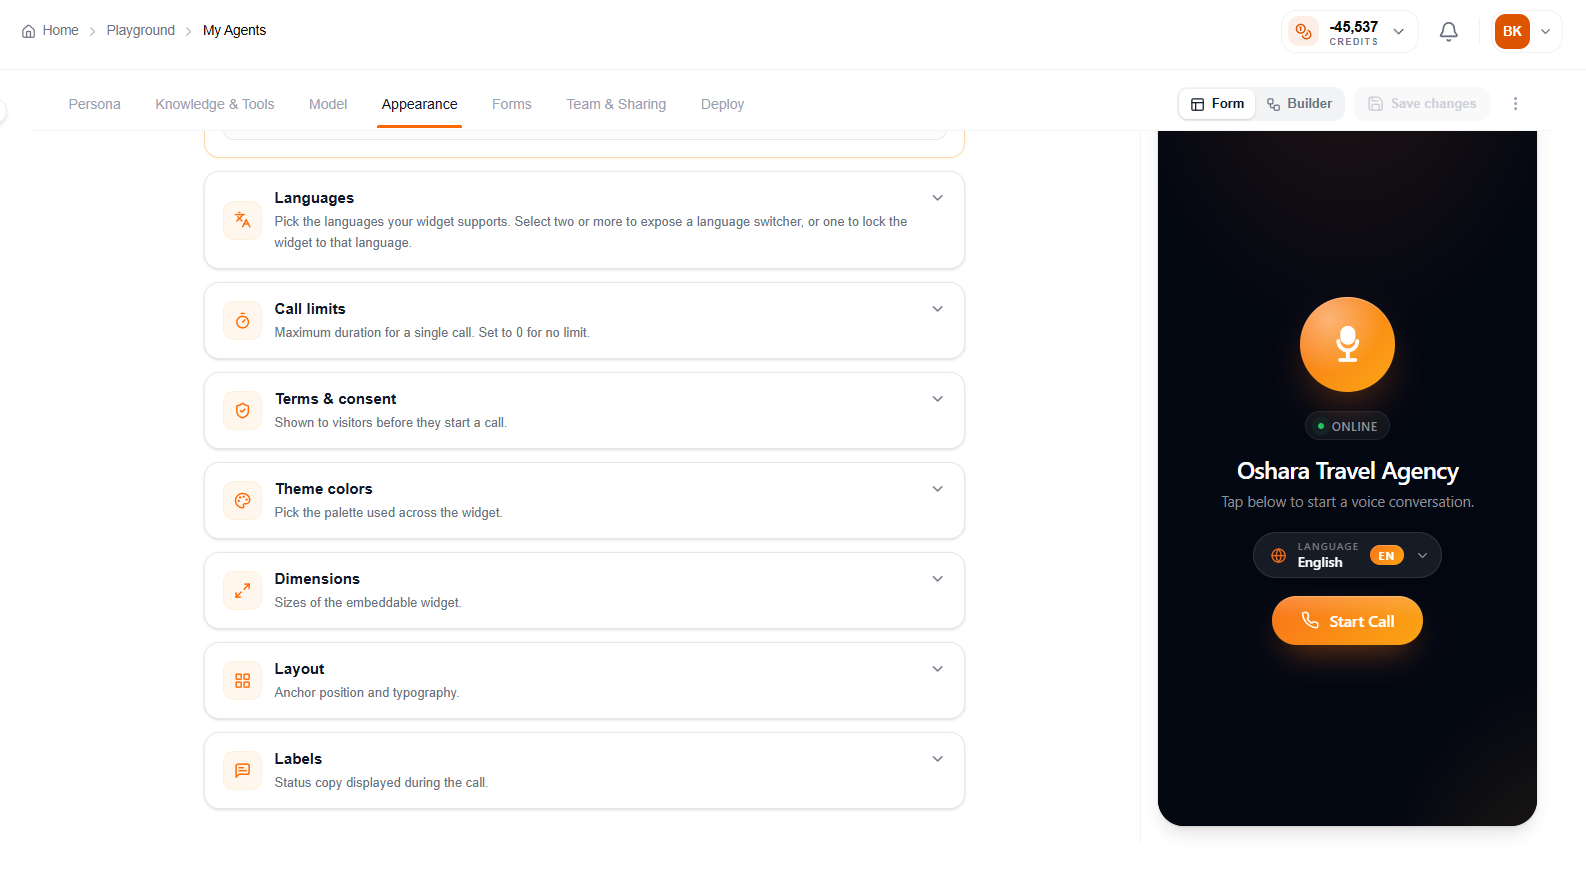
Below that, expand the remaining sections as needed: Languages (pick one to lock the widget, or two or more to show a language switcher), Call limits (max call duration; 0 = no limit), Terms & consent, Theme colors, Dimensions, Layout, and Labels.
Key controls
- Branding — names, labels and watermark
- Live preview — reflects your edits instantly
- Widget settings — Languages, Call limits, Terms & consent, Theme colors, Dimensions, Layout, Labels
08 · Forms: collect info mid-conversation
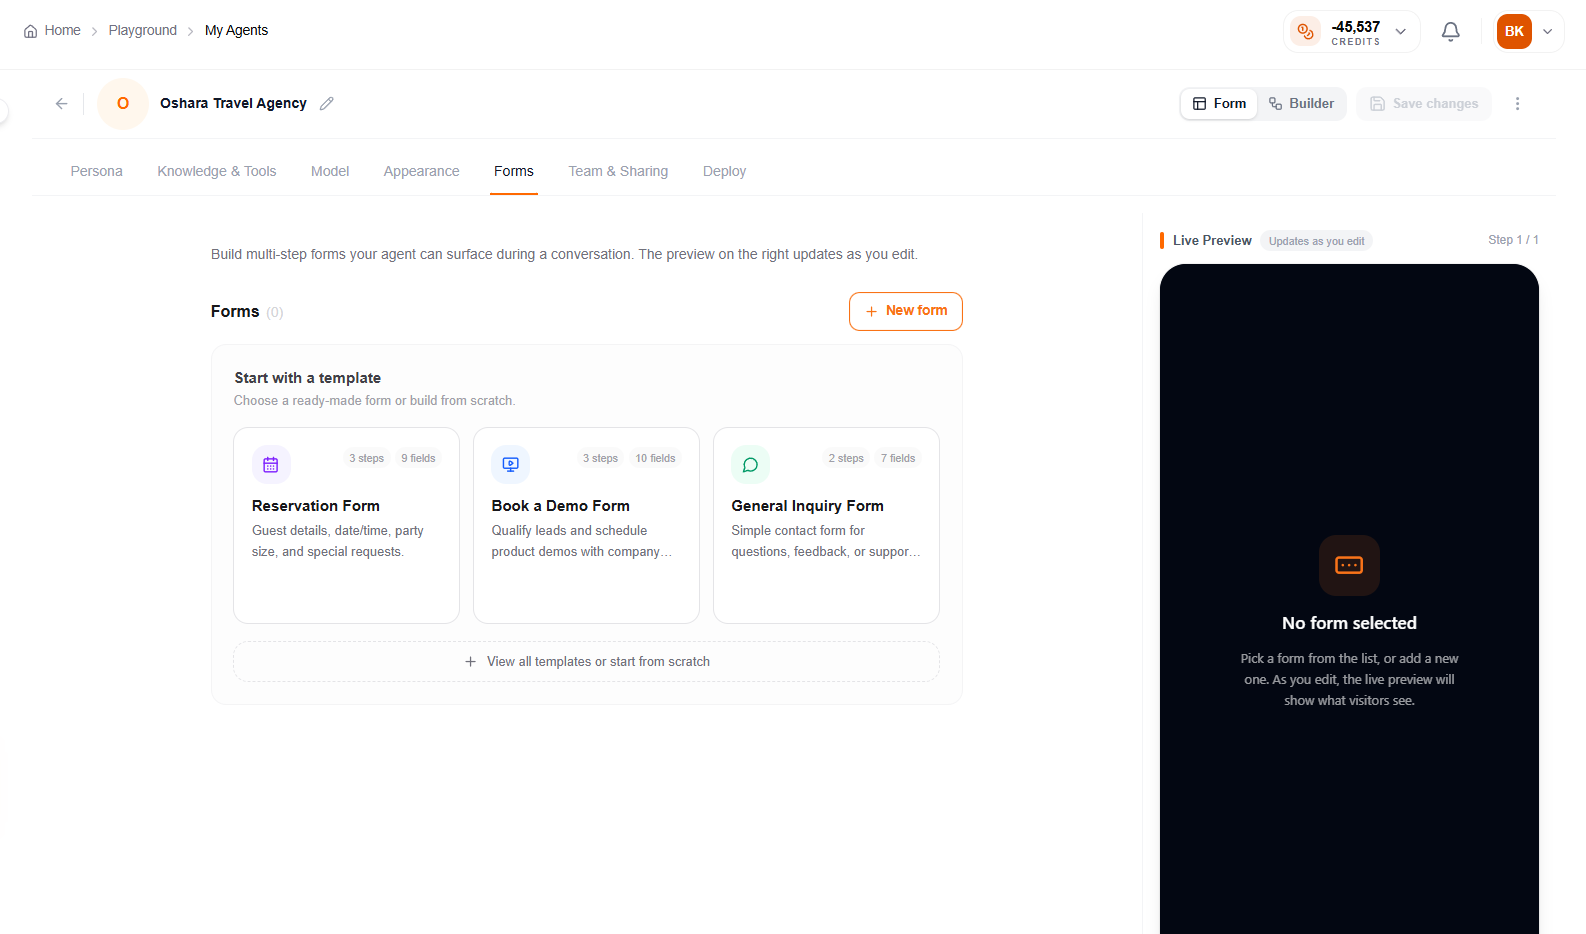
Build multi-step forms the agent can surface during a call — the live preview updates as you edit. Start from a ready-made template (Reservation, Book a Demo, or General Inquiry), or click New form to build one from scratch.
09 · Team & Sharing: collaborate and route calls
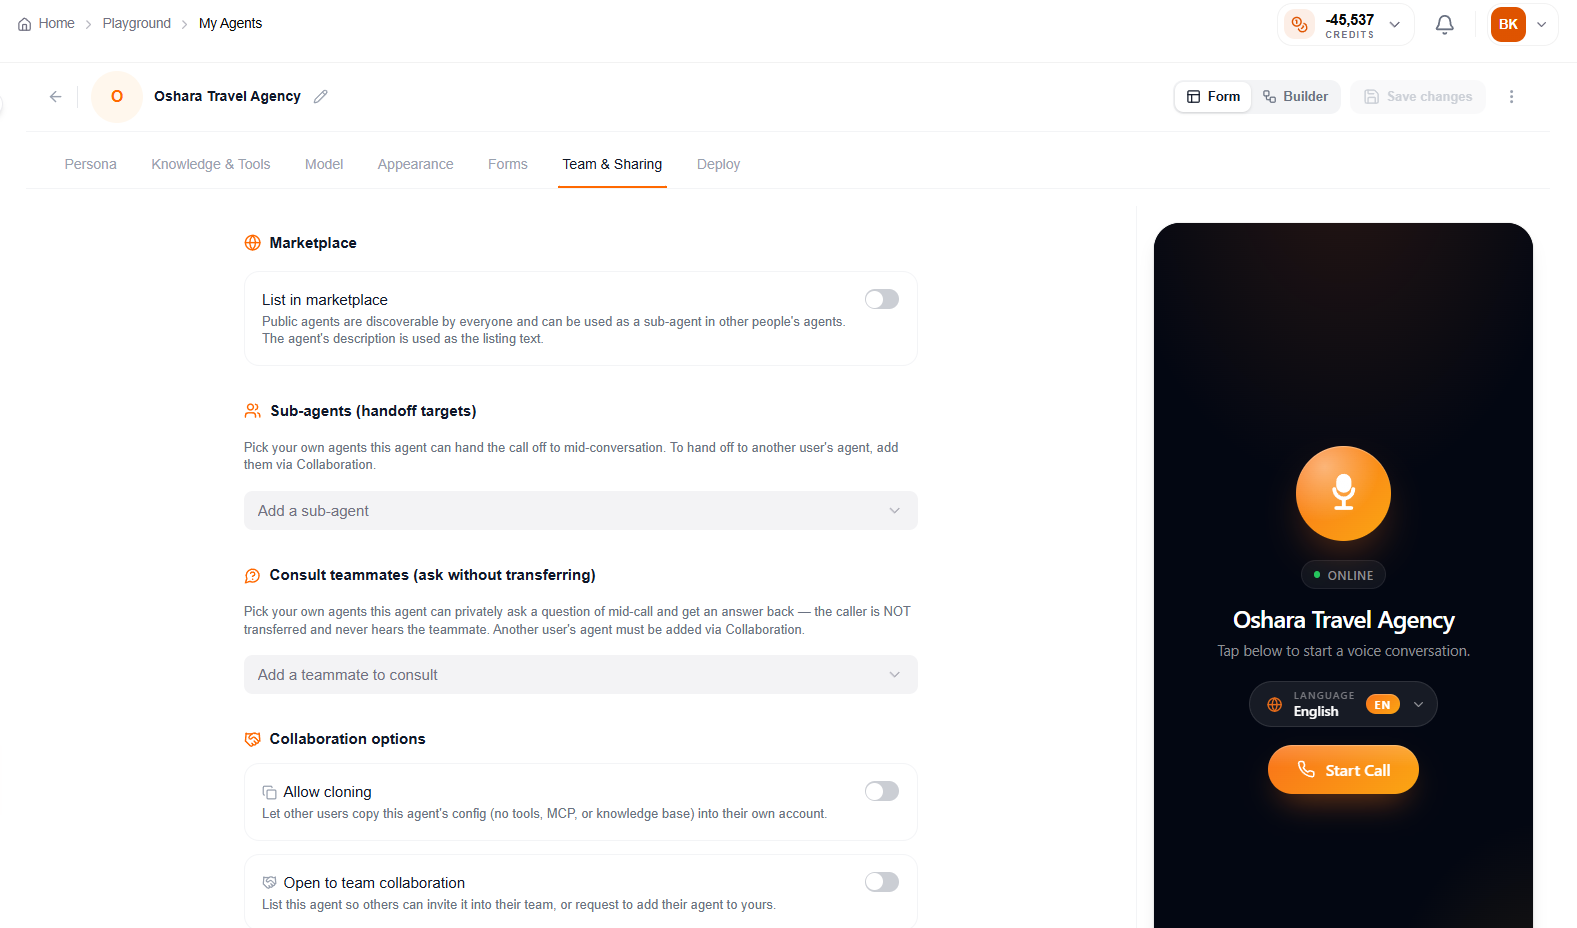
Decide how the agent is shared and how it works alongside others. List in marketplace makes it public and usable for any other users. Add sub-agents this agent can hand a call off to, or teammates it can privately consult without transferring the caller. Collaboration options let others clone the config or invite the agent into their team. Save your choices with Save sharing settings.
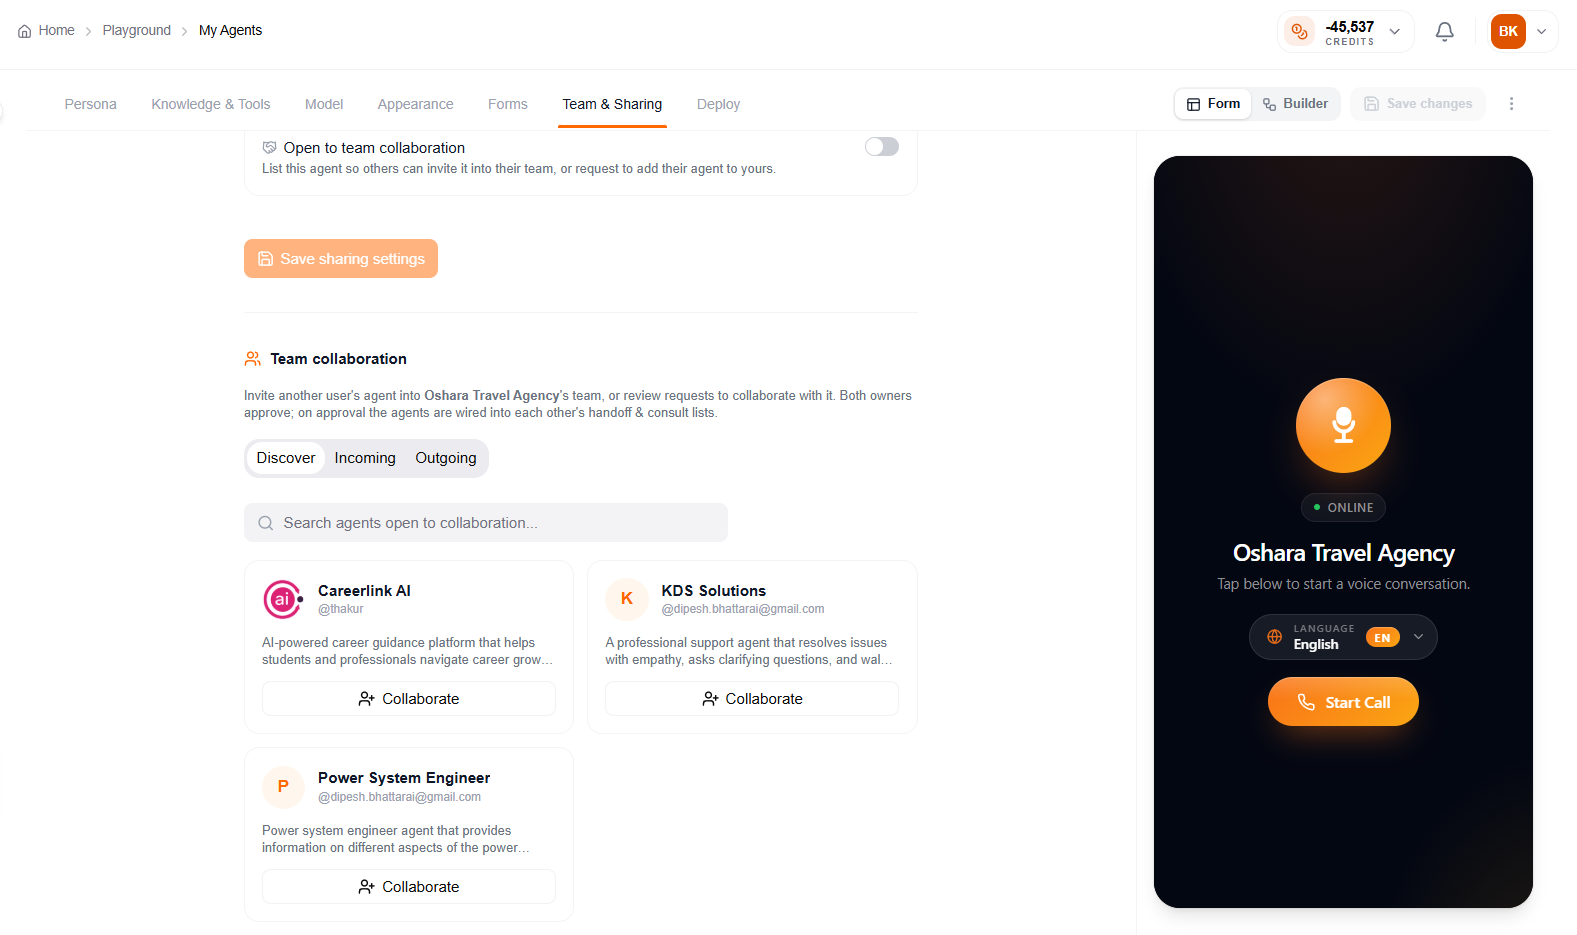
Under Team collaboration you’ll also find agents that other users have opened up for collaboration. Browse them under Discover (or check the Incoming / Outgoing request tabs), search by name, and click Collaborate on any agent to send its creator a request. Once the creator approves, that agent is wired into your handoff and consult lists — so you can route calls to it just like your own.
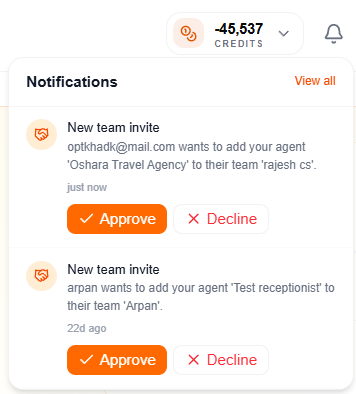
Requests from other people show up in your Notifications (the bell, top-right) as a New team invite. Click Approve to link the two agents or Decline to dismiss it — the owner has to approve before the agents can work together.
One thing to note: if you only want to hand off between agents you created yourself, you don’t need any of this. Just pick them directly in the Handoff section of Sub-agent logic. The collaboration flow above is only needed when you want to use someone else’s agent.
Key controls
- List in marketplace — make the agent public / usable
- Add sub-agent / Add teammate to consult — route to your own agents
- Save sharing settings — save your marketplace & collaboration choices
- Team collaboration — Discover / Incoming / Outgoing agents others have opened up
- Collaborate — sends the agent’s creator a request; on approval it joins your handoff & consult lists
- Notifications → New team invite — Approve or Decline requests from others
- Agents you created yourself can be added directly in Handoff / Consult — no request needed
10 · Builder view: the visual canvas
Same configuration as the Form view, but if you prefer a map to a form, click Builder to switch views. Every part of the agent — Model & Voice, Appearance, Knowledge, Sub-agents and Deploy — becomes a node wired to the central Agent node. Use the [+] button to add nodes, Tidy up to auto-arrange, and the Test agent panel on the right to try a live conversation. It edits the exact same configuration as the Form view.
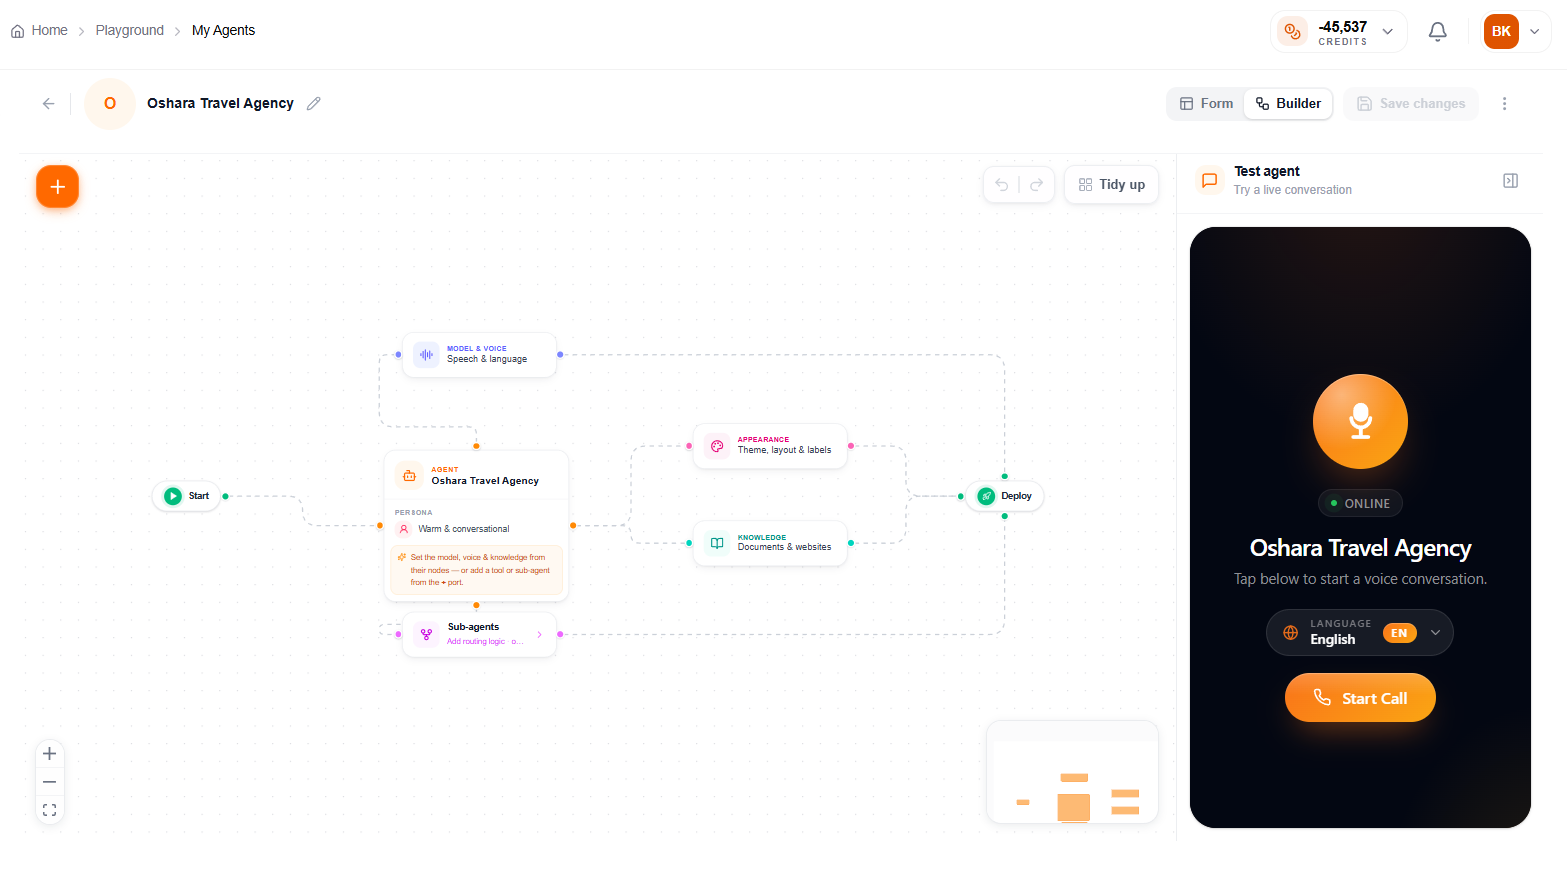
Key controls
- Builder view — the Form / Builder switch
- Add node — the + button
- Visual flow — nodes for each part of the agent
- Deploy node — jump straight to embedding
11 · Sub-agent logic: handoff & consult
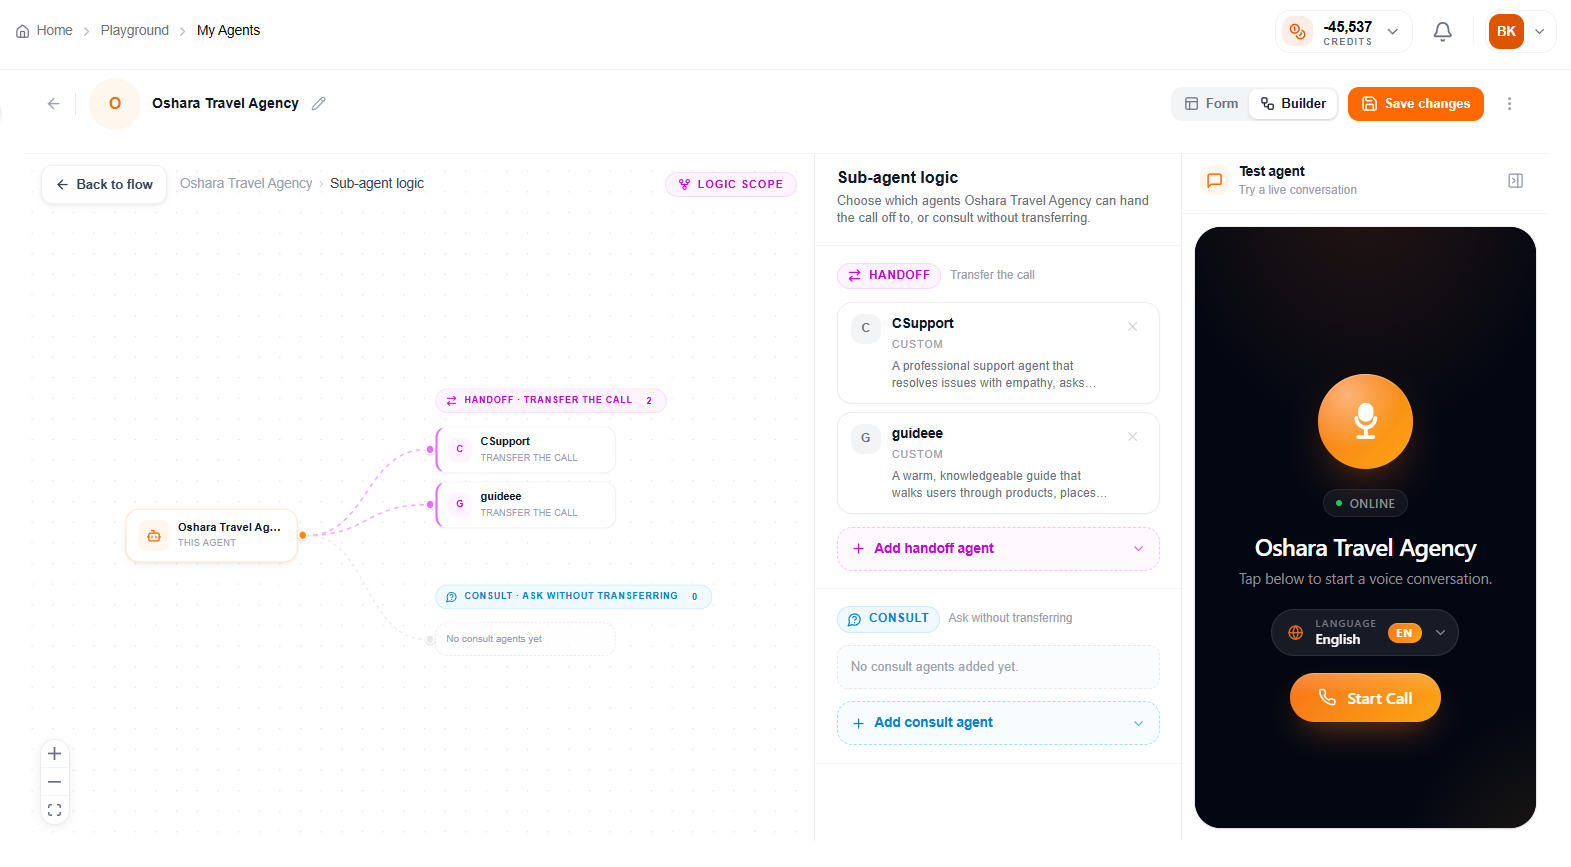
Open the Sub-agents node to route calls between agents. Handoff transfers the whole call to another agent (e.g. CSupport or Guideee). Consult lets this agent privately ask another agent a question mid-call and get an answer back — the caller stays on the line and never hears the teammate. Add agents to either list with Add handoff agent / Add consult agent, then Save changes.
12 · Deploy: put it on your site
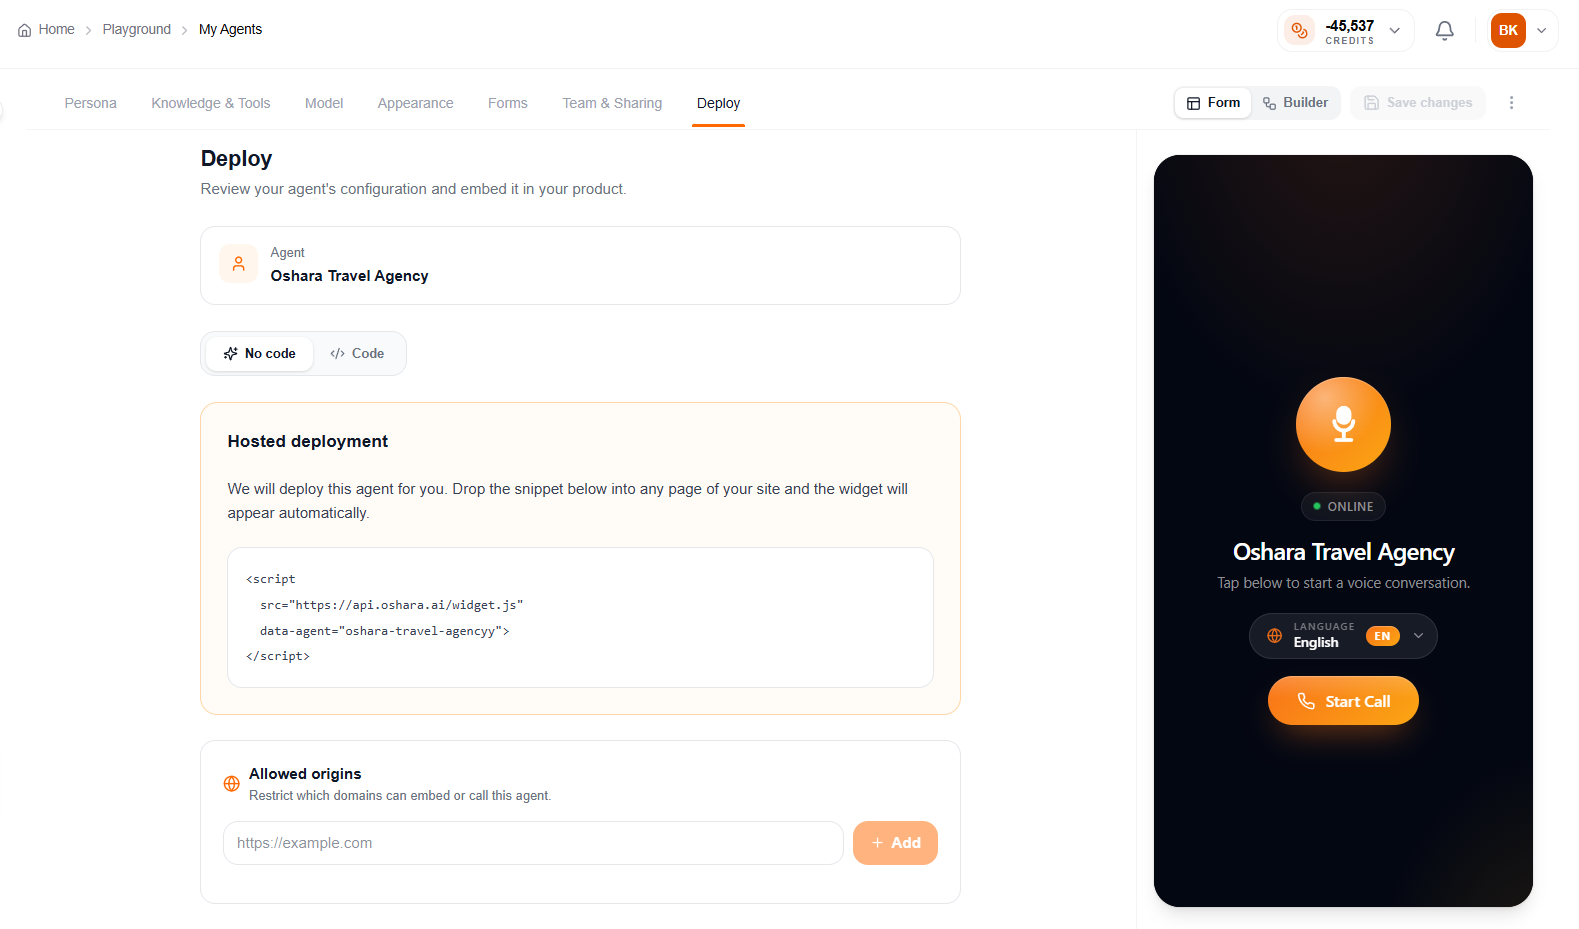
Finally, embed the agent. Choose No code for a fully hosted widget or Code for the raw snippet. Copy the embed snippet and drop it into any page of your site — the widget appears automatically. Use Allowed origins to restrict which domains are allowed to embed or call this agent.
Key controls
- Deploy tab — where embedding lives
- No-code / Code — hosted widget vs. raw snippet
- Embed snippet — paste into any page
- Allowed origins — lock down which domains can use it
That’s the full loop
Create → configure the seven tabs (or wire it up in Builder) → route with sub-agents → deploy. You can revisit any tab at any time — changes take effect once you hit Save changes.